*HR: How to add New Staff
OVERVIEW:
When employing your new staff member/contractor, this basic information is required to get them entered into scaflog so their name can appear in different areas in the system including the use of Scaflog and the Scaflog APP.
Like most menus throughout Scaflog there is a magnifying glass and a + Button on the top right hand side of the screen. To add a new staff member click the + button.
FIRST STEP:
- Go to the ADMIN MENU and the Staff List
- Here is a quick link: https://creatorapp.zoho.com/100rails/goscaffold/#Report:Staff_List
- Click the ADD button in the Top right.
ADDING NEW STAFF/CONTRACTOR
Basic Information
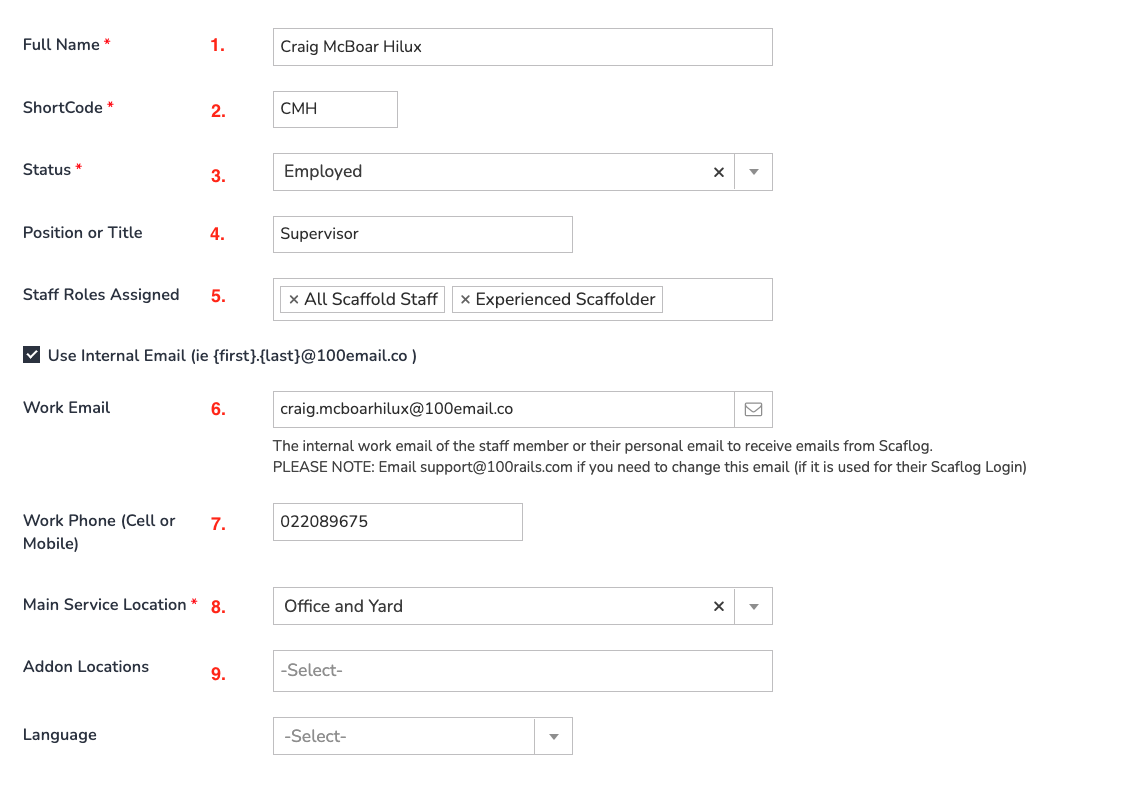
- Full Name: If using Payroll Module this will need to be exactly as it is is your existing Payroll System
- Short Code: Initials of the persons name (cannot have duplicates of these so it is best to use the first initial of the first name and then the first two letters of the second name. E.g. For Jane Doe the short code would be JDO)
- Status: Employed is set as default, however they could be a contractor so select this instead.
- Position or title: This would be their official title in your organisation that can appear on quotes and invoices etc
- Staff Roles Assigned: There will be a set of default job roles in here or you can add a new one by left click "Add a Staff Role" name the Role required, Status as Current, Job description if required and scroll to bottom and Update. (These can be edited by our support team upon request)
- Work Email: Each employee needs their OWN email to USE Scaflog. If they don't have a work email or personal one that they don't want to use and you require them to use the Scaflog APP, the Scaflog support team can set them up with a free 100email.co. email address. If they will not be using Scaflog you can leave out the email address as this wont be necessary.
- Work Phone: Mobile number is required for publishing of schedule but also for general storage of their information
- Main Service Location: This is normally your main location of your yard.
- Addon Locations: If you have more than 1 location, and you require this employee to see information about jobs assigned to different locations, then pop these in here.
- Scroll to the section that deals with security permissions and most of the time for staff in the field you will only need to select Clocking App and/or Onsite (See the image below)

Scroll to the bottom and submit to save.